Google Summer of Code 2018 with Debian - Week 4
Posted on Tue 12 June 2018 in GSoC
After working on designs and getting my hands dirty with KIVY for the first 3 weeks, I became comfortable with my development environment and was able to deliver features within a couple of days with UI, tests, and documentation. In this blog, I explain how I converted all my Designs into Code and what I've learned along the way.
The Sign Up
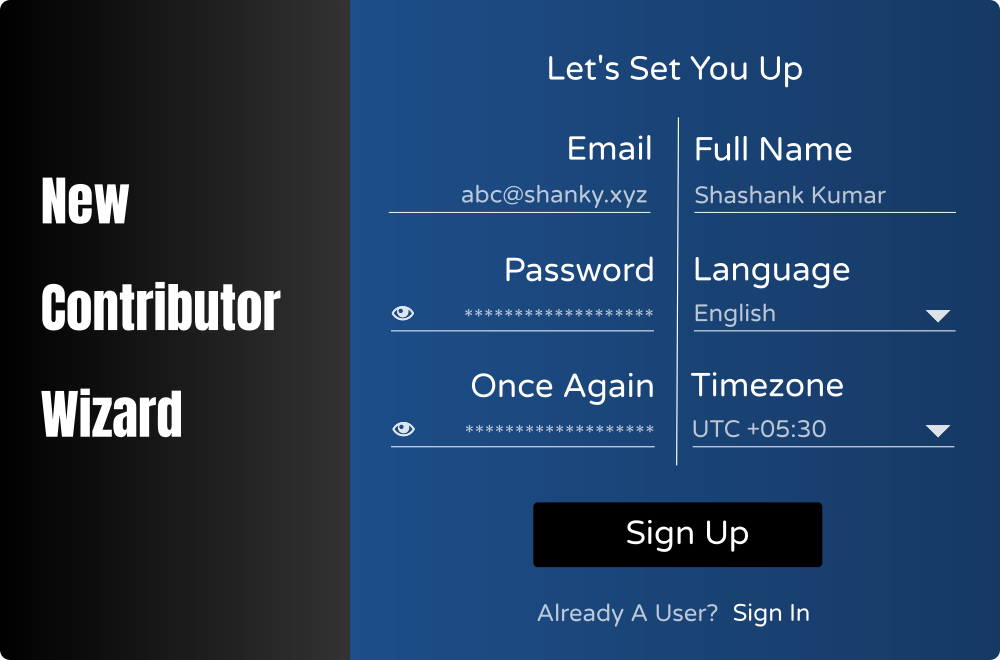
In order to implement above design in KIVY, the best way is to write a user kv-lang. It involves writing a kv file which contains widget tree of the layout and a lot more. One can learn more about kv-lang from the documentation. To begin with, let us look at the simplest kv file.
BoxLayout:
    Label:
        text: 'Hello'
    Label:
        text: 'World'
KV Language
In KIVY, in order to build UI widgets are used. Also, widget base class is what is derived to create all other UI elements like layouts, button, label and so on in KIVY. Indentation is used in kv just like in Python to define children. In our kv file above, we're using BoxLayout which allows us to arrange all its children in either horizontal(by default) or vertical orientation. So, both the Labels will be oriented horizontally one after another.
Just like children widgets, one can also set values to properties like Hello to text of the first Label in above code. More information about what properties can be defined for BoxLayout and Label can be seen from their API documentaion. All which remains is importing this .kv (say sample.kv) file from your module which runs KIVY app. You might notice that for now Language and Timezone are kept static. The reason is, Language support architecture is yet to be finalized and both the options would require a Drop Down list, design and implementation for which will be handled separately.
In order for me to build the UI following the design, I had to experiment with widgets. When all was done, signup.kv file contained the resultant UI.
Validations
Now, the good part is we have a UI, the user can input data. And the bad part is user can input any data! So, it's very important to validate whether the user is submitting data in the correct format or not. Specifically for Sign Up module, I had to validate Email, Passwords and Full Name submitted by the user. Validation module can be found here which contains classes and methods for what I intended to do.
It's important that user gets feedback after validation if something is wrong with the input. This is done by exchanging the Label's text with error message and color with bleeding red by calling prompt_error_message for unsuccessful validation.
Updating The Database
After successful validation, Sign Up module steps forward to update the database in sqlite3 module. But before that, Email and Full Name is cleaned for any unnecessary whitespaces, tabs and newline characters. Universally unique identifier or uuid is generated for the user_id. Plain text Password in changed to sha256 hash string for security. Finally, sqlite3 is integrated to updatedb.py to update the database. SQlite database is stored in a single file and named new_contributor_wizard.db. For user information, the table named USERS is created if not present during initialization of UpdateDB instance. Finally, information is stored or error is returned if the Email already exists. This is how the USERS schema looks like.
id VARCHAR(36) PRIMARY KEY,
email UNIQUE,
pass VARCHAR(64),
fullname TEXT,
language TEXT,
timezone TEXT
After the Database is updated, i.e. successful account creation of user, the natural flow is to take the user to the Dashboard screen. In order to make this feature atomic, integration with Dashboard would be done once all 3 (SignUp, SignIn, and Dashboard) features are merged. So, in order to showcase successful sign-up, I've used text confirmation. Below is the screencast of how the feature looks and what changes it makes in the database.
The Sign In
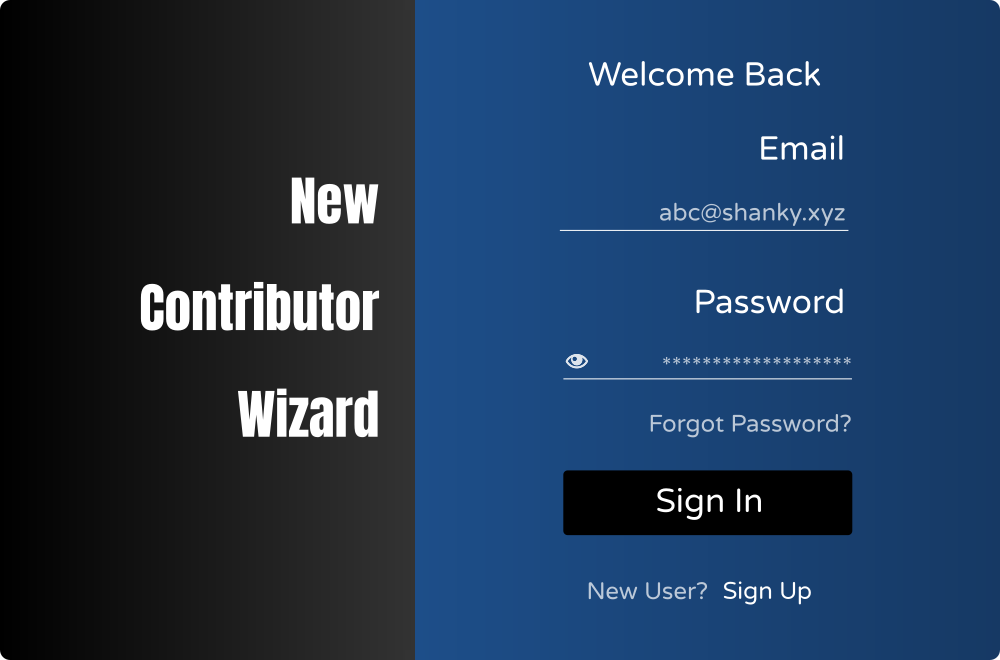
If you look into the difference in UI of SignIn module in comparison with the SignUp, you might notice a few changes.
- The
New Contributor Wizardis now right-aligned - Instead of 2 columns taking user information, here we have just one with
EmailandPassword
Hence, the UI experiences only a little change and the result can be seen in singin.py.
Validations
Just like in the Sign Up modules, we are not trusting user's input to be sane. Hence, we validate whether the user is giving us a good format Email and Password. The resultant validations of Sign In modules can be seen in validations.py.
Updating The Database
After successful validation, next step would be cleaning Email and hashing the Password entered by the user. Here we have two possibilities of unsuccessful signin,
- Either the Email entered by the user doesn't exist in the database
- Or the Password entered by the user is not correct
Else, the user is signed in successfully. For the unsuccessful signin, I have created a exceptions.py module to prompt the error correctly. updatedb.py contains the database operations for Sign In module.
The Exceptions
Exceptions.py of Sign In contains Exception classes and they are defined as
- UserError - this class is used to throw an exception when Email doesn't exist
- PasswordError - this class is used to throw an exception when Password doesn't match the one saved in the database with the corresponding email.
All these modules are integrated with signin.py and the resultant feature can be seen in action in the screencast below. Also, here's the merge request for the same.
The Dashboard
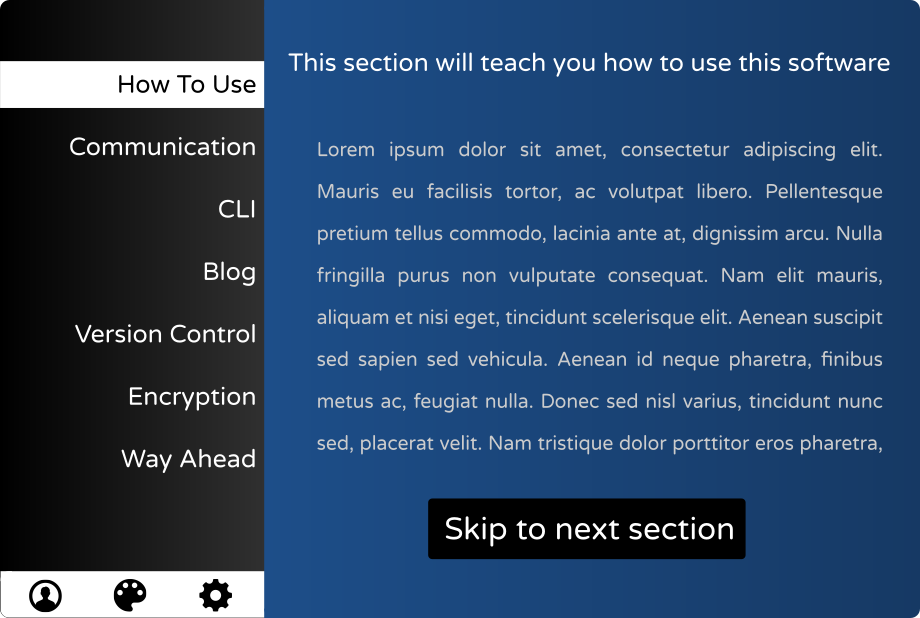
The Dashboard is completely different than the above two modules. If New Contributor Wizard is the culmination of different user stories and interactive screen then Dashboard is the protagonist of all the other features. A successful SignIn or SignUp will direct the user to the Dashboard. All the tutorials and tools will be available to the user henceforth.
The UI
There are 2 segments of the Dashboard screen, one is for all the menu options on the left and another is for the tutorials and tools for the selected menu option on the right. So, it was needed to change the screen on the right all the time while selecting the menu options. KIVY provides a widget named Screen Manager to manage such an issue gracefully. But in order to have control over the transition of just a part of the screen rather than the entire screen, one has to dig deep into the API and work it out. Here's when I remembered a sentence from the Zen of Python, "Simple is better than complex" and I chose the simple way of changing the screen i.e. by adding/removing widget functions.
In the dashboard.py, I'm overidding on_touch_down function to check which menu option the user clicks on and calling enable_menu accordingly.
The menu options on the left are not the Button widget. I had an option of using the Button directly but it would need customization to make them look pretty. Instead, I used BoxLayout and Label to incorporate a button like feature. In enable_menu I only check on top of which option user is clicking using the touch API. Now, all I have to do is highlight the selected option and unfocus all the other options. The final UI can be seen here in dashboard.kv.
Courseware
Along with highlighting the selected option, Dashboard also changes to the courseware i.e. tools and tutorials for the selected option on the right. To provide a modular structure to application, all these options are build as separate modules and then integrated into the Dashboard. Here are all the modules for the courseware build for the Dashboard,
blog- Users will be given tools to create and deploy their blogs and also learn the best practices.cli- Understanding Command Line Interface will be the goal with all the tutorials provided in this module.communication- Communication module will have tutorials for IRC and mailing lists and showcase best communication practices. The tools in this module will help user subscribe to the mailing lists of different open source communities.encryption- Encrypting communication and data will be tough using this module.how_to_use- This would be an introductory module for the user for them to understand how to user this application.vcs- Version Control Systems like git is important while working on a project whether personal or with a team and everything in between.way_ahead- This module will help users reach out to different open source communities and organizations. It will also showcase open source project to the user with respect to their preference and information about programs like Google Summer of Code and Outreachy.
Settings
Below the menu are the options for settings. These settings also have separate modules just like courseware. Specifically, they are described as
application_settings- Would help out user to manage setting which are specific to KIVY application like resolutions.theme_settings- User can manage theme related setting like color schema using this optionprofile_settings- Would help the user manage information about themselves
The merge request which incorporates the Dashboard feature in the project can be seen in action in the screencast below.
The Conclusion
The week 4 was a bit satisfying for me as I felt like adding value to the project with these merge requests. As soon as the merge requests are reviewed and merged in the repository, I'll work on integrating all these features together to create a seamless experience as it should be for the user. There are few necessary modifications to be made in the features like supporting multiple languages and adding the gradient to the background as it can be seen in the design. I'll create issues on redmine for the same and will work on them as soon as integration is done. My next task would be designing how tutorials and tasks would look in the right segment of the Dashboard.